16.301: Design and Manufacturing I (NEET AM)

This was a special section of 2.007 for NEET Autonomous Machines students. It focused more on the practical building/coding portions of making a robot, as opposed to the math. I had a lot of fun and barely won the competition! :)
From the course catalog for 2.007: Develops students’ competence and self-confidence as design engineers. Emphasis on the creative design process bolstered by application of physical laws. Instruction on how to complete projects on schedule and within budget. Robustness and manufacturability are emphasized. Subject relies on active learning via a major design-and-build project. Lecture topics include idea generation, estimation, concept selection, visual thinking, computer-aided design (CAD), mechanism design, machine elements, basic electronics, technical communication, and ethics.
Outline
(Generated by Gemini 2.0 Flash Experimental)
1. Safety Training
Mandatory safety glasses, closed-toe shoes with thick soles, and no dangling jewelry or loose clothing when using power tools. Tie up long hair or beards, and use tools to remove sharp chips. Clean up 10 minutes before the lab ends. Use Fusion 360 for CAD; online tutorials are available.
Step drills cut clean holes in thin metal, with size matching the step. Only use on 2 mm or less material; use jobber drills for thicker materials. Don’t leave bits on the drill press table. Imperial sizes are separate; ask the instructor. Jobber drills cut deeper; use sacrificial material to prevent burs. Countersink deburring tools remove burs.
Calipers measure precisely. Metal scribes mark metal or plastic. Center punches mark drill locations, preventing wobbling. Use a ball peen hammer on a flat surface to strike the center punch. Countersink deburring tools clean holes; hand files smooth edges; sheet metal shears cut various curves/lines.
Sheet metal shears cut sheet metal; sheet metal brakes bend it, with mini brakes being more precise. Drill presses drill holes. Table top sanders sand materials. Band saws cut materials.
Lasers have usage lights. Cryogens off-gas. Robotics areas require staying clear and wearing eye protection. Don’t touch chemicals.
Use the MIT Mobile app for the emergency response guide. Call MIT Police for emergencies, not 911. Labs have panic buttons at entrances. Use campus emergency phones by dialing 100. Report the situation, location, and time, staying on the line until told to hang up. Working alone is prohibited without supervisor notification and approval. Cell phones may be okay in certain situations.
If exits are blocked during a fire, find a smoke-free room, and call 100 or 617-253-1212. Crawl in smoke, and feel doors before opening. Use stairwells, not elevators. Stop, drop, and roll if your clothes catch fire, and cool burns with running water. In an active shooter situation, run if possible; if not, hide and remain quiet. Fight as a last resort.
Overloaded sockets can cause electrical accidents. Keep cords out of the way, the workspace neat, and report poor lighting or damaged carpets.
2. Workshop Machines
Step drills cut clean holes in thin sheet metal with minimal burs. They cut multiple sized holes, with the size corresponding to the step indicated on the bit. Use step drills only for materials 2 mm or less, and never for thicker materials. For thick materials, use jobber drills. Don’t leave drill bits on the drill press table.
Jobber drills cut deeper holes than step drills. To prevent burs, use sacrificial material under your part. A countersink deburring tool can easily remove burs. Never leave unused drill bits on the drill press table.
Calipers measure objects precisely in millimeters, decimal inches, and fractions of an inch. Metal scribes mark metal or hard plastic. Center punches create small circular indentations on materials to mark drill locations, and ball peen hammers are used to strike the center punch.
Countersink deburring tools clean up the outer surfaces of drilled holes. Hand files smooth rough edges. Sheet metal shears cut sheet metal and come in configurations for left curves/straight lines, left/right curves, and straight/right curves.
Sheet metal shears cut sheet metal. Sheet metal brakes bend sheet metal. Mini sheet metal brakes are more precise for bending.
To use the sheet metal shear, place the material in the slot, and press down hard on the pedal until a clean cut is made. A mini sheet metal shear has a slot for insertion and a lever for cutting. This tool also works as a sheet metal bender, with a slot at the bottom and an adjustable block. Plan bending order to insert the entire sheet easily.
The drill press is for drilling holes. To use it, adjust the height, lock the stand, insert and tighten the drill bit, and make sure it’s secure. Use the laser to line up the cut location, with a wood block underneath to prevent burs, and use clamps. Use the spinning wheel to lower the drill bit, raising it after it goes through and starts chipping the wood.
Table top sanders sand away material, use earmuffs and be careful. Gently press the material to the sander, rotating to create shapes. The machine takes time to fully turn off.
Band saws cut materials. Use the knobs to adjust the height. Put on earmuffs, turn on the saw, press the sheet metal down on the stand, and move to cut. For U-shaped cuts, you might need to cut triangles first. Regular glasses are okay, so safety glasses are optional.
Countersink deburring tools clean up the outside surfaces of drilled holes by inserting the tool into the hole and spinning it. Hand files smooth rough edges, use the circular one. Sheet metal shears are used to cut tangent lines around a circle, before using the metal sander, and the band saw.
3. CAD
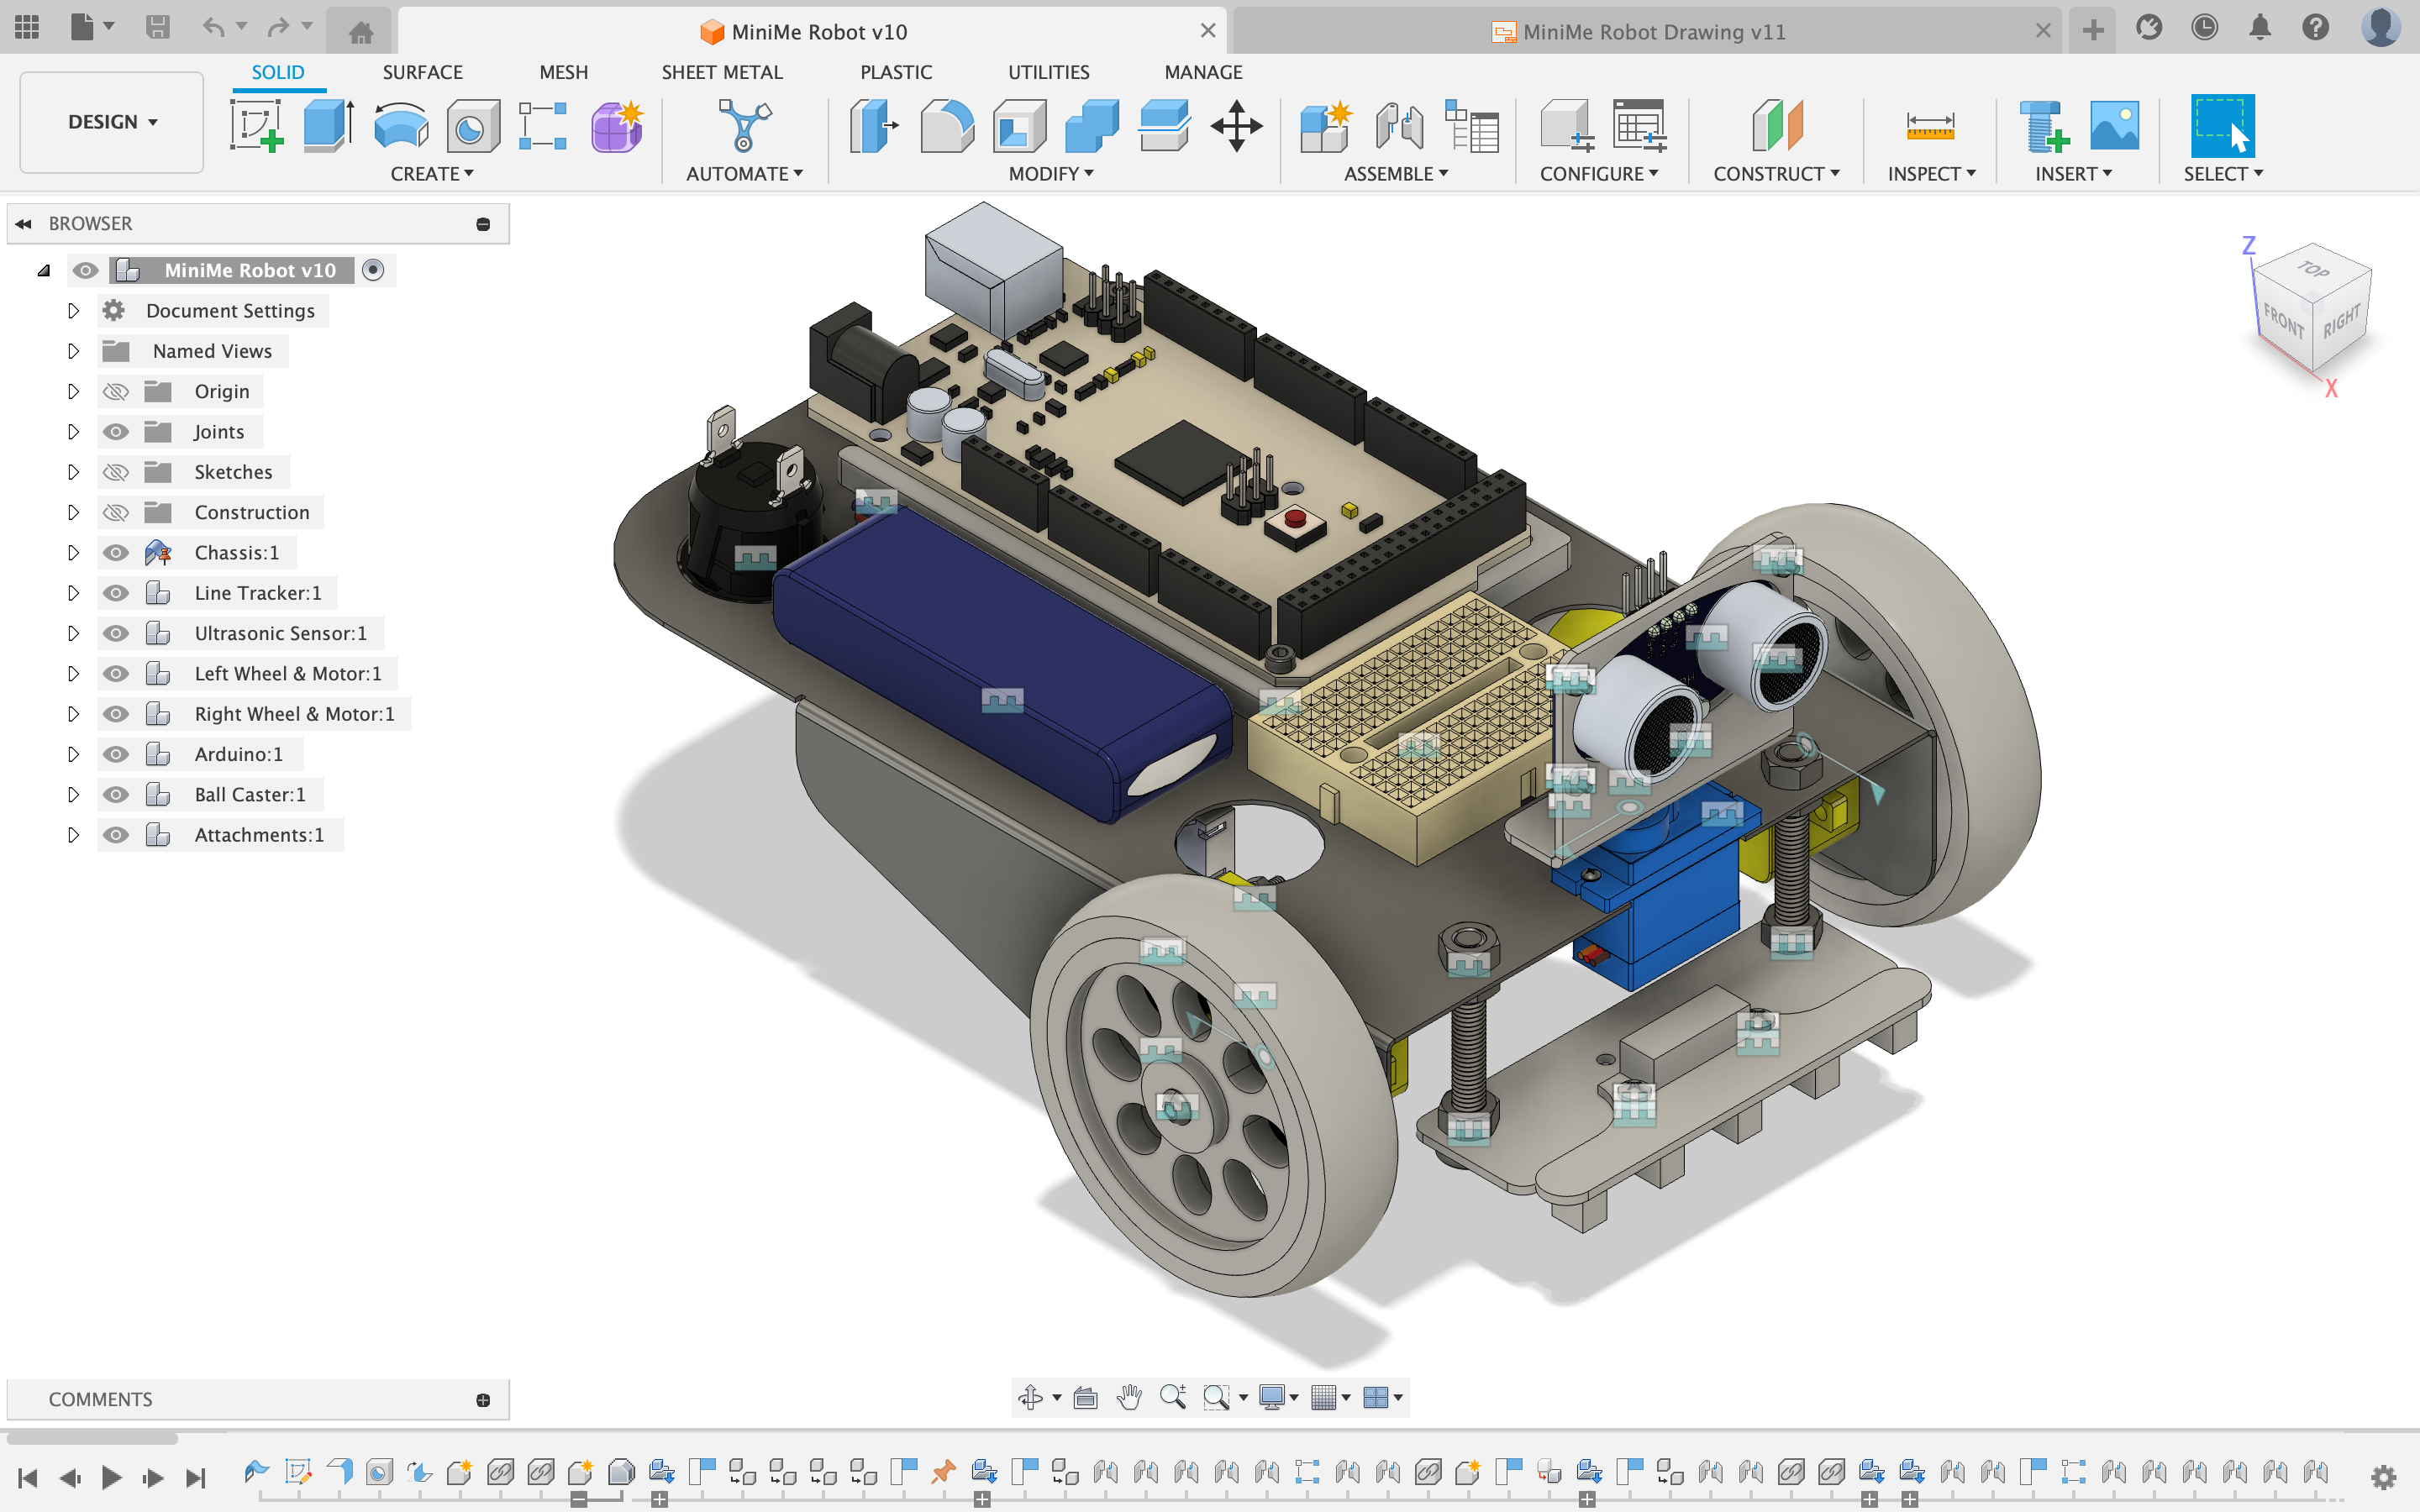
Start with a flat sketch in CAD first. Use relative constraints and bend parts later. Sketches are 2D, and Extrude makes them 3D. Use dimensions to mark offsets.
Sketch is the most frequently used tool. Use constraints and then Flange, Extrude creates new pieces and cuts out parts, but first, you need to sketch. Rip cuts parts through sheet metal. Design in 3D, since Fusion unfolds and makes flat patterns. Drawings can be used to auto-draw dimensions.
Lines are fully constrained when they turn black, and sketches are fully constrained with a lock symbol. Fully constrained sketches define all geometry. Use a combination of constraints and dimensions.
Group components by creating “parent components,” and name them well. Organize the timeline by making groups for important things.
For sheet metal parts, export as a STEP file, and find the components in McMaster-Carr using part numbers. Use rectangular patterns to quickly copy screws. Align objects and then make a rigid group instead of adding rigid joints for every screw. Use joints for dynamic motions, like rotation or translation.
Fusion’s timeline is powerful, especially when updating earlier parts of a design.
Be careful with construction lines/planes because they are positioned relative to the component they are in. So, do not do them in the top-level component.
Sheet metal parts can be cut on the waterjet. This takes 15-30 minutes to finish.
4. Robot Building Tips
Prioritize simple modules that get points. Sketches, foam core, or CAD can be used for prototyping. Prefabricated parts are available in the racks. Use any space and tools available.
Motors can rotate, use direct attachment or gear reduction. Gears that open into a straight line (conveyor belt) or scissor lifts can create linear motion. Put your name on your battery. Adafruit motor drivers drive 5 motors, and sensor shields are for convenience. Use the clamping tool with the red wire to install the battery. Gray drill heads have step sizes of 0.5, red has 0.1.
Limit switches can check for contact. Infrared sensors give distance to a specific point, while ultrasonic sensors give distance within a cone. The controller uses radio and telemetry, and can control multiple robots with manual or autonomy. Program knobs to your preference, and it has buttons, joysticks, a potentiometer, and a switch. Some servos are continuous, while some are potentiometer based. Gear reductions reduce speed and increase torque. Timing belts and pulleys, and prefabricated parts are available. Electrical tape acts as insulation, and masking tape protects areas from paint.
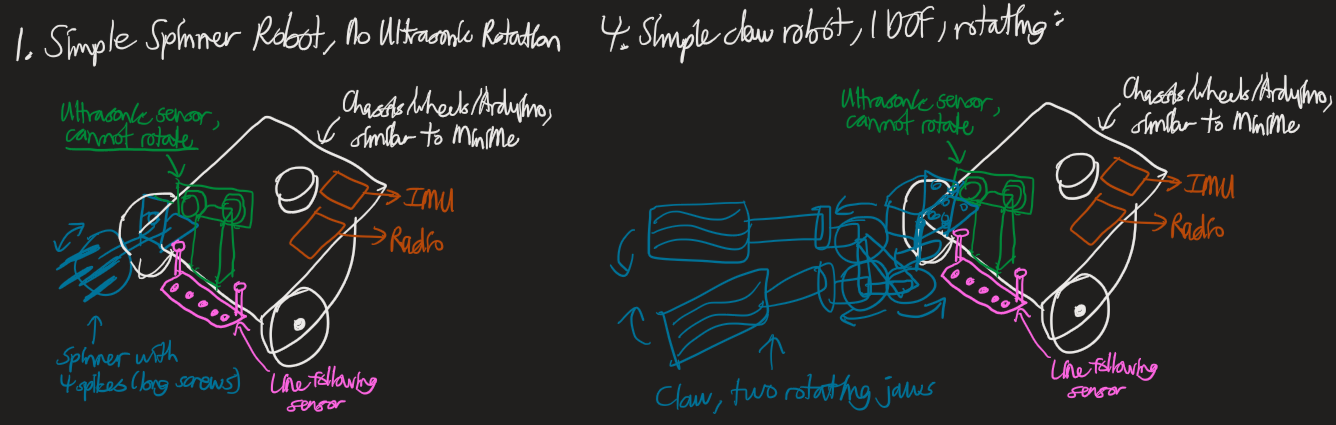
Making a claw is a good starting point, and can be used for many tasks. Lock nuts have plastic that shrinks and act as nuts that stay in position. Use wrenches and hexdrivers to screw them in. Shafts use C-edges, which require custom cuts. Washers lower friction, and there are motor washers. Flax can be used instead of rubber for grippers. Left-handed scissors are useful, and Makeblock/goBilda parts are interchangeable. Don’t technically need CAD; focus on autonomy.
Manufacturers combine existing parts, and you can do the same by searching for DIY X (like DIY power supply). Track position by integrating velocity/acceleration. Electrical components are fragile.
Use shaft connectors with the longer shaft part into the motor. Tighten the connector using M3 set screws. Use motor brackets for stationary attachment before the gear. The new motor uses ~0.25 A to lift the palace, and you can pull down the power supply cords to test motors.
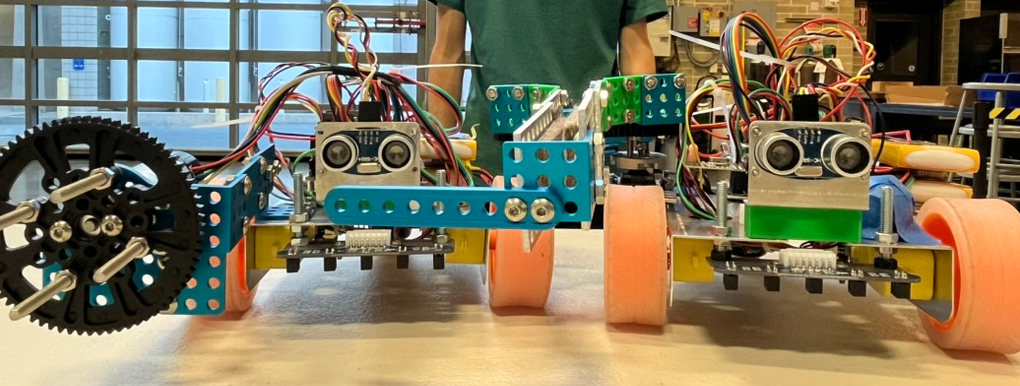
Scissor lifts can be flimsy for lateral forces. All motors are available, 25 RPM motors don’t work. Use gearboxes to increase torque or speed. Too much current drains voltage, and radio signal is lost. Use 2 batteries, 1 for the controller. More mass is needed at the front for traction, and balance matters too. Focus on milestones. The MakeBlock/GoBilda holes are 4 mm in diameter, with 8 mm adjacent centers.
Last updated: 29 January 2025